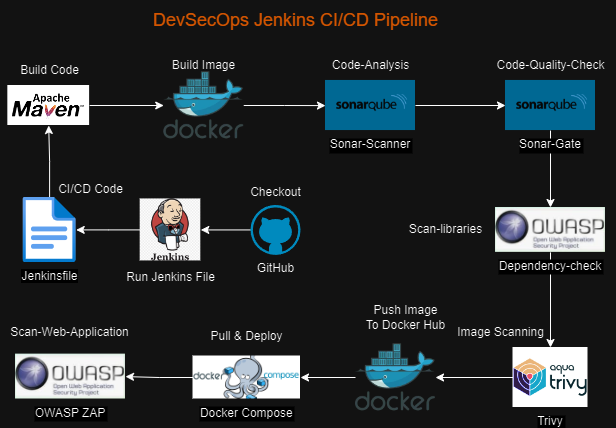
Step-by-Step Guide to DevSecOps Pipeline with Jenkins and Docker and SAST and DAST Tools.
Hi Folks, Your thoughts and suggestions are invaluable to me! Feel free to leave comments on my posts. Let's connect and grow together!
Prerequisites:-
Hardware Requirement
Minimum hardware requirements:
- 256 MB of RAM 1 GB of drive space (although 10 GB is a recommended minimum if running Jenkins as a Docker container)
Recommended hardware configuration for a small team:
- 4 GB+ of RAM 50 GB+ of drive space Installation of Java
Installation of Java
 sudo apt update
 sudo apt install fontconfig openjdk-17-jre
 java -version
 openjdk version "17.0.8" 2023-07-18
 OpenJDK Runtime Environment (build 17.0.8+7-Debian-1deb12u1)
 OpenJDK 64-Bit Server VM (build 17.0.8+7-Debian-1deb12u1, mixed mode, sharing)
Installation of Jenkins, My Jenkins IP is 192.168.100.117 and Port is 8080.
 sudo wget -O /usr/share/keyrings/jenkins-keyring.asc \
   https://pkg.jenkins.io/debian-stable/jenkins.io-2023.key
 echo "deb [signed-by=/usr/share/keyrings/jenkins-keyring.asc]" \
   https://pkg.jenkins.io/debian-stable binary/ | sudo tee \
   /etc/apt/sources.list.d/jenkins.list > /dev/null
 sudo apt-get update
 sudo apt-get install jenkins
Install Trivy on Jenkin Server
 sudo apt-get install wget apt-transport-https gnupg lsb-release
 wget -qO - https://aquasecurity.github.io/trivy-repo/deb/public.key | sudo apt-key add -
 echo deb https://aquasecurity.github.io/trivy-repo/deb $(lsb_release -sc) main | sudo tee -a /etc/apt/sources.list.d/trivy.list
 sudo apt-get update
 sudo apt-get install trivy
Install SonarQube on Jenkin Server
 # login to docker hub
 docker login
 # pull and install Official image from dockerhub
 docker run -d -p 9000:9000 --name sonarqube sonarqube:latest
Install Docker and docker-compose on Jenkin Server as well as Guest Machine.
 # Add Docker's official GPG key:
 sudo apt-get update
 sudo apt-get install ca-certificates curl
 sudo install -m 0755 -d /etc/apt/keyrings
 sudo curl -fsSL https://download.docker.com/linux/ubuntu/gpg -o /etc/apt/keyrings/docker.asc
 sudo chmod a+r /etc/apt/keyrings/docker.asc

 # Add the repository to Apt sources:
 echo \
   "deb [arch=$(dpkg --print-architecture) signed-by=/etc/apt/keyrings/docker.asc] https://download.docker.com/linux/ubuntu \
   $(. /etc/os-release && echo "$VERSION_CODENAME") stable" | \
   sudo tee /etc/apt/sources.list.d/docker.list > /dev/null
 sudo apt-get update

 # Install Docker
 sudo apt-get install docker.io docker-compose-v2
 # check the login user
 whoami
 # add the user in docker group
 sudo usermod -aG docker $USER
 # we can make the changes successfully with below commad or else reboot your system.
 newgrp docker
Install Plugins on Jenkins:
SSH Agent
SonarQube Scanner
OWASP Dependency Check
OWASP ZAP
Active Choice
Blue Ocean
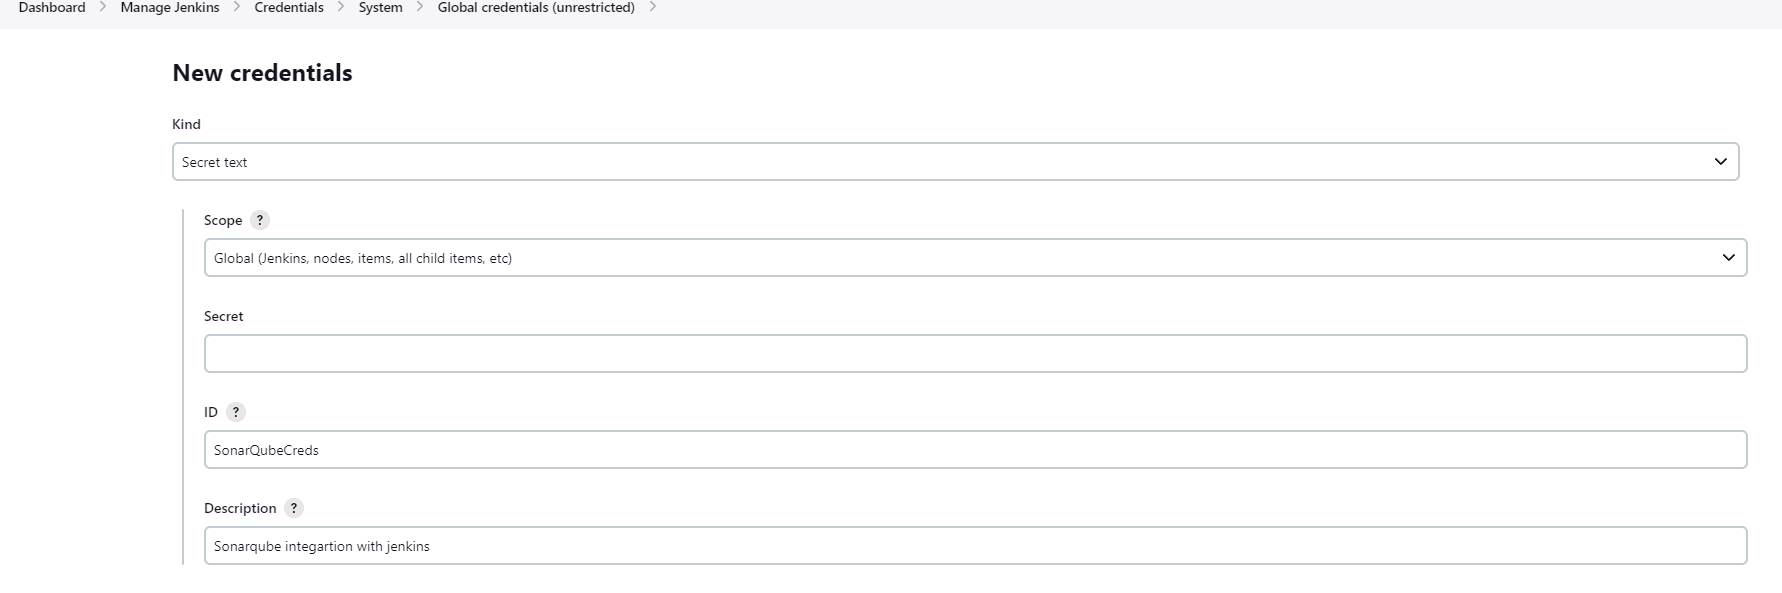
Create Credentials
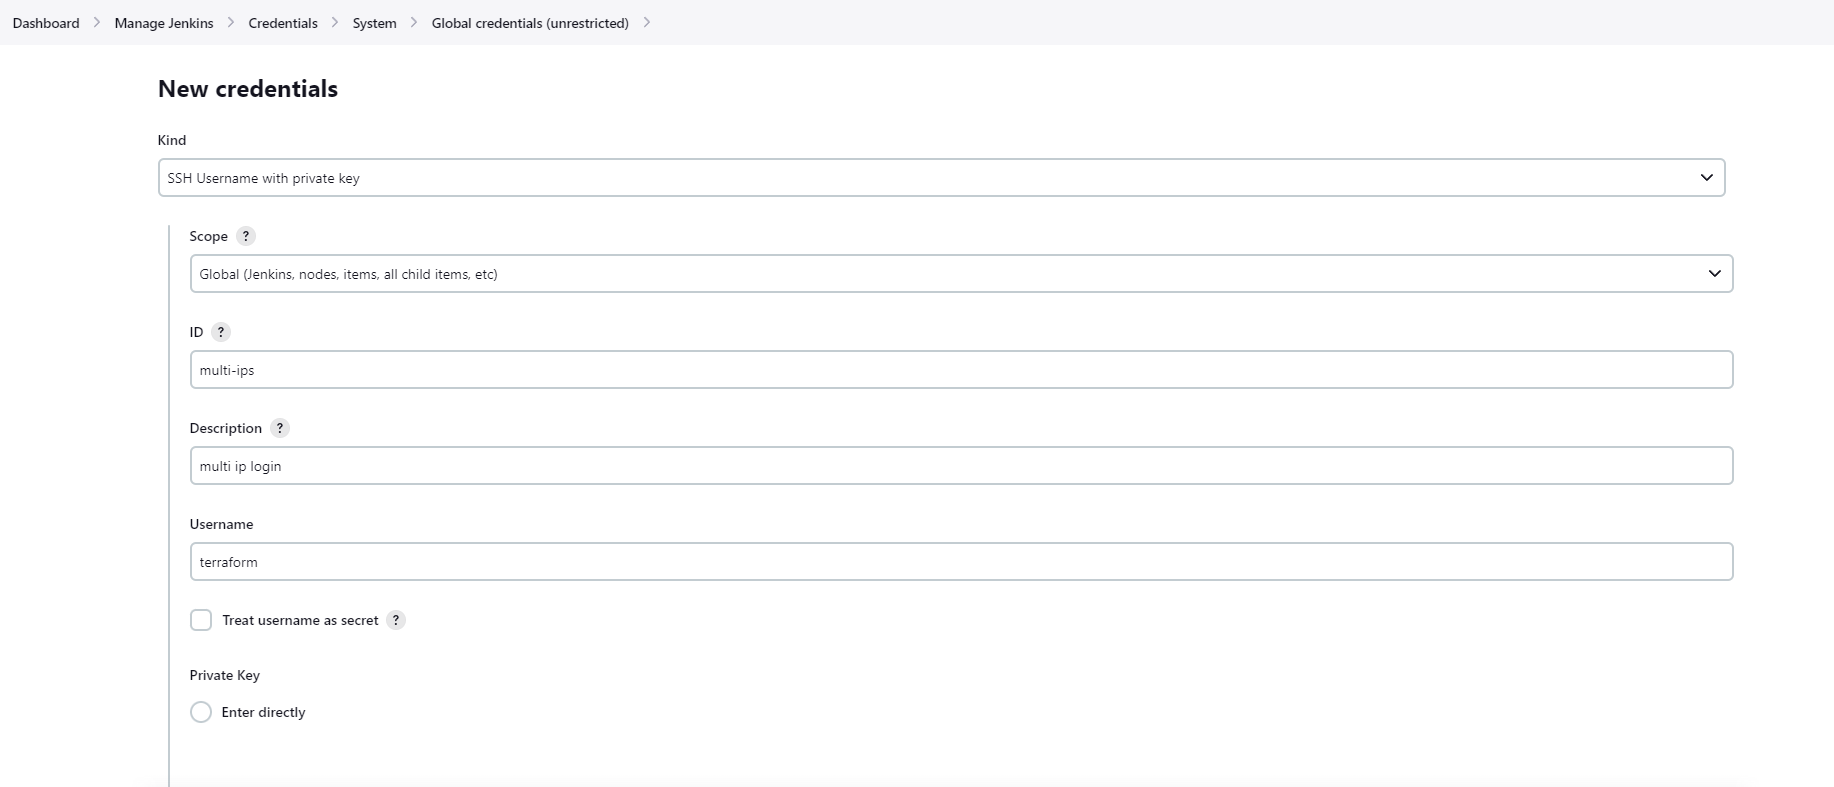
SSH-Agent configuration
Copy Jenkins Public key to the All Remote host wherever you want to deploy a project.
  # If public, private key is not generated in Jenkins Server just run below command and enter
  ssh-keygen
  # Copy Public key from Jenkins server, public key extension is .pub
  cd /home/username/.ssh
  vi id_rsa.pub
  # Remote Host IP
  cd /home/username/.ssh
  # Paste Public key in autorized keys file
  vi authorized_keys
Copy Private key from Jenkins Server and paste here. Private Key==> Click on Enter directly option and paste private key here.
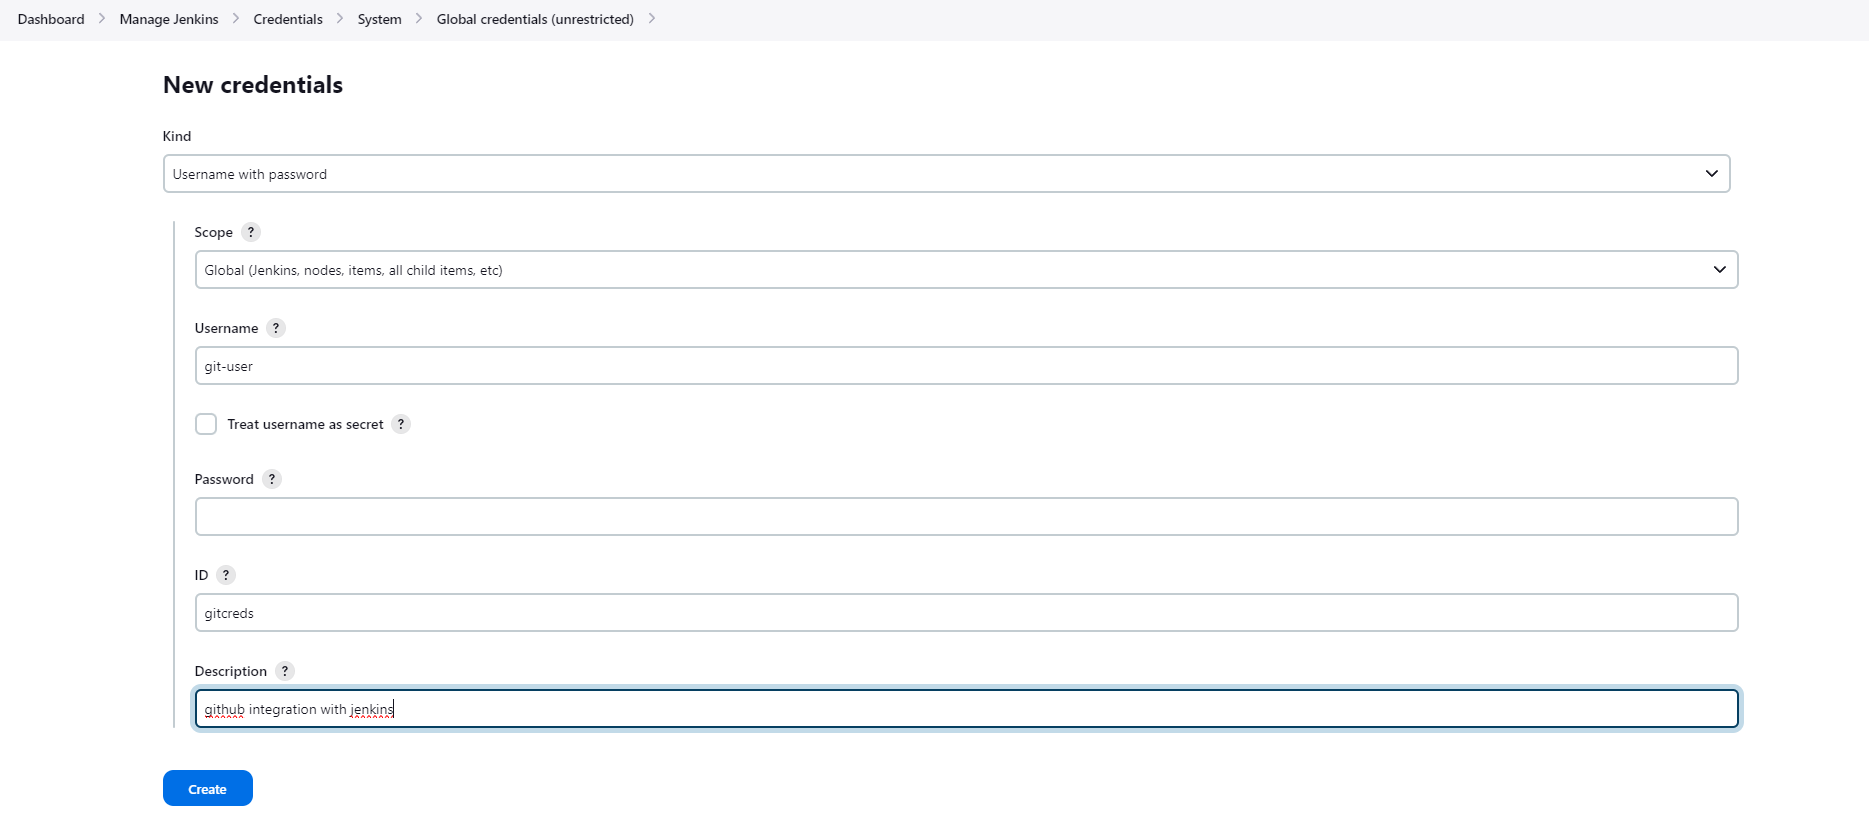
Git Hub and Jenkins Integration
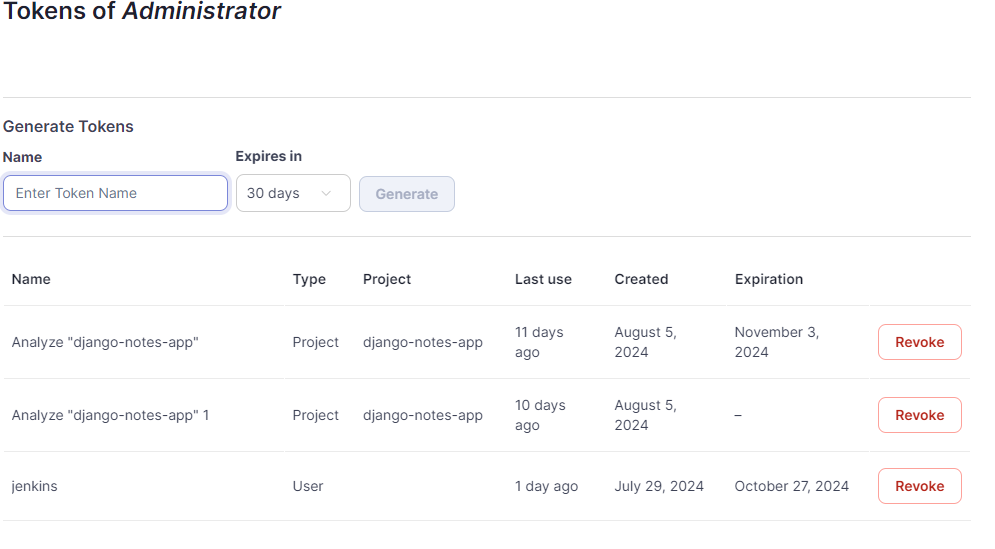
Generate Token, Login to GitHub Account. GoTo Profile Icon==>setting==>Developer setting==>Personal Access Token==> Token classic==> Generate new token==> Generate new token(classic). Now, give the name of token and expiration date then permission for token. Copy Token in safe place or in a file for Further use.

Use that token in Jenkins as a Password to create the credentials. Afterward we can use that credential-id in Jenkins pipeline for the git repo clone.
SonarQube and Jenkins Integration.
Login To SonarQube, GoTo Administration==>Security==>Users==> Token==> Click on 3-dots==>Generate Token==>Name and Expiry. Copy Token in safe Place or in a file for further use.
Use that token in Jenkins as a secret to create the credentials. Afterward we can use that ID in Jenkins Server Configuration to configure Authentication Token. For more understanding, Check Step-10.
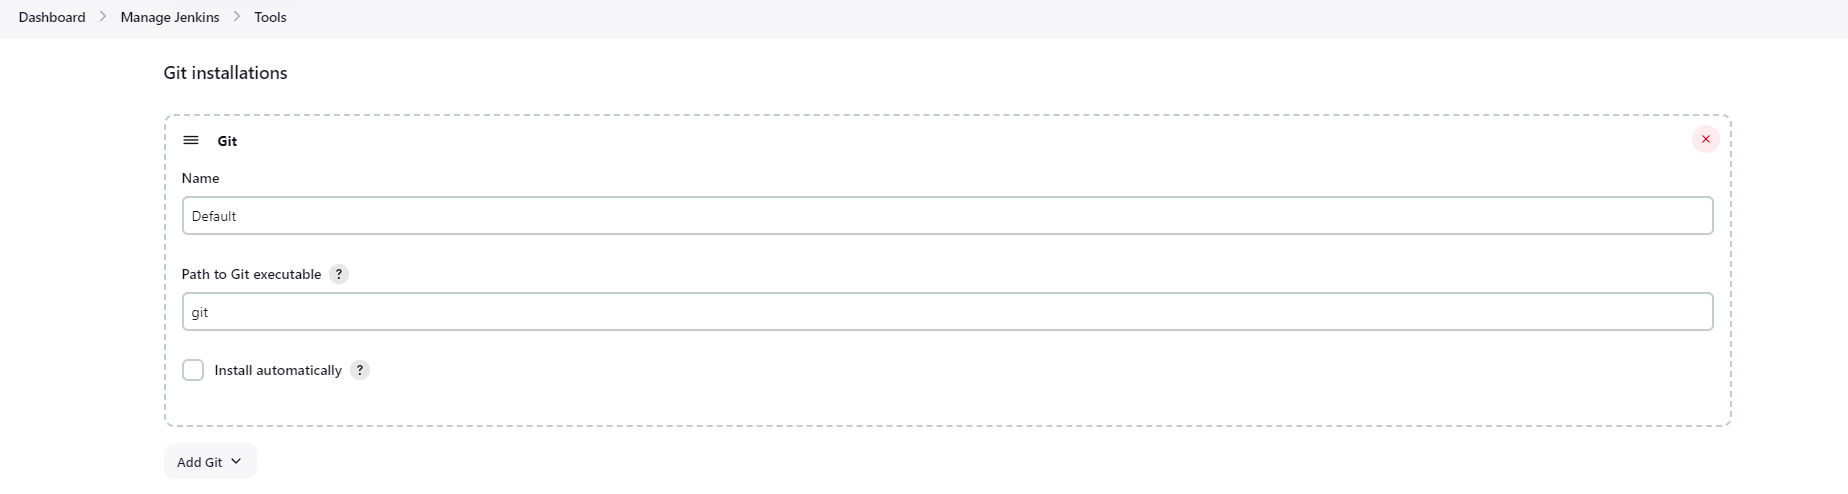
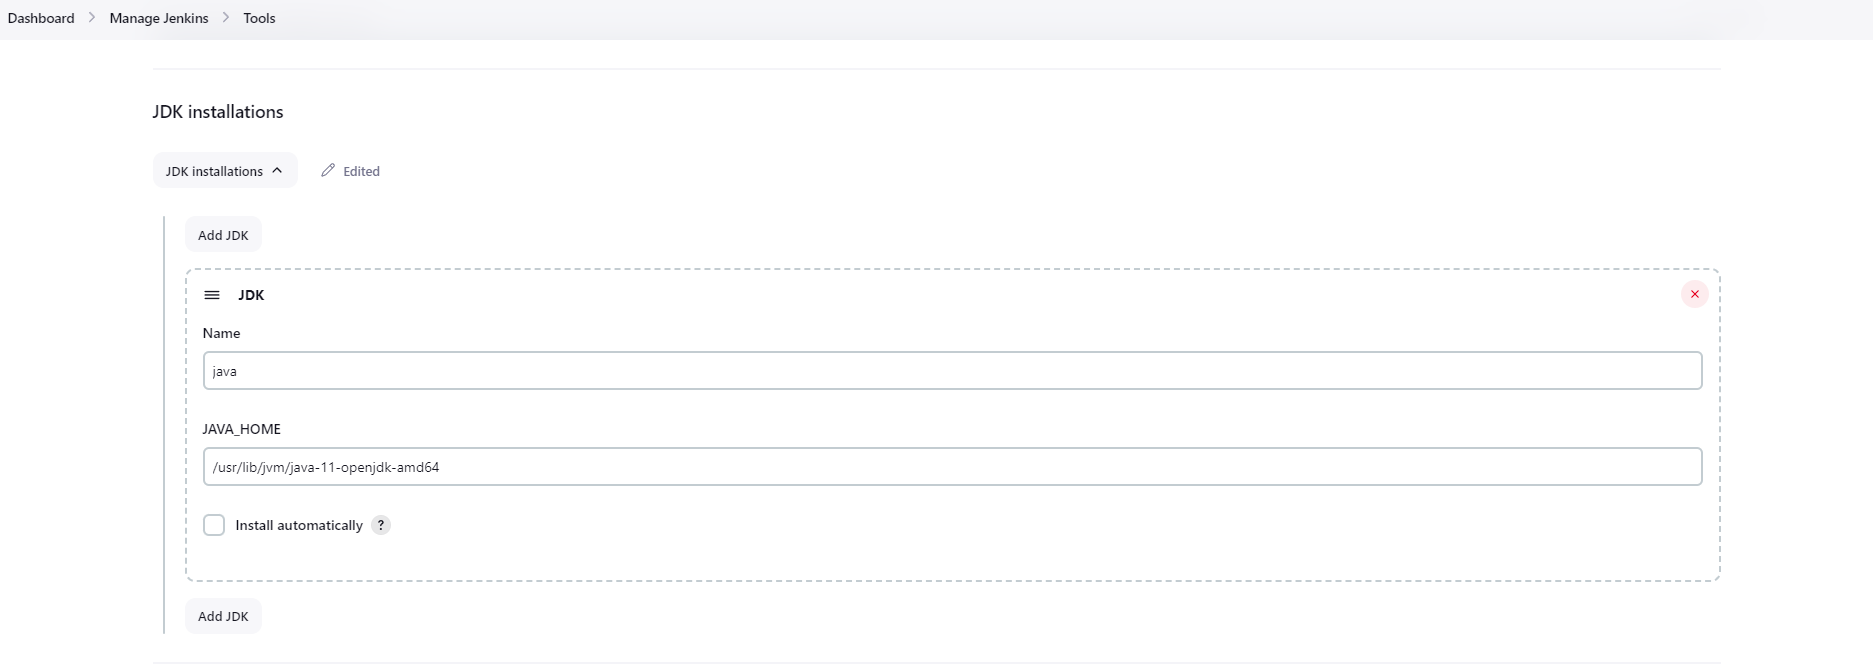
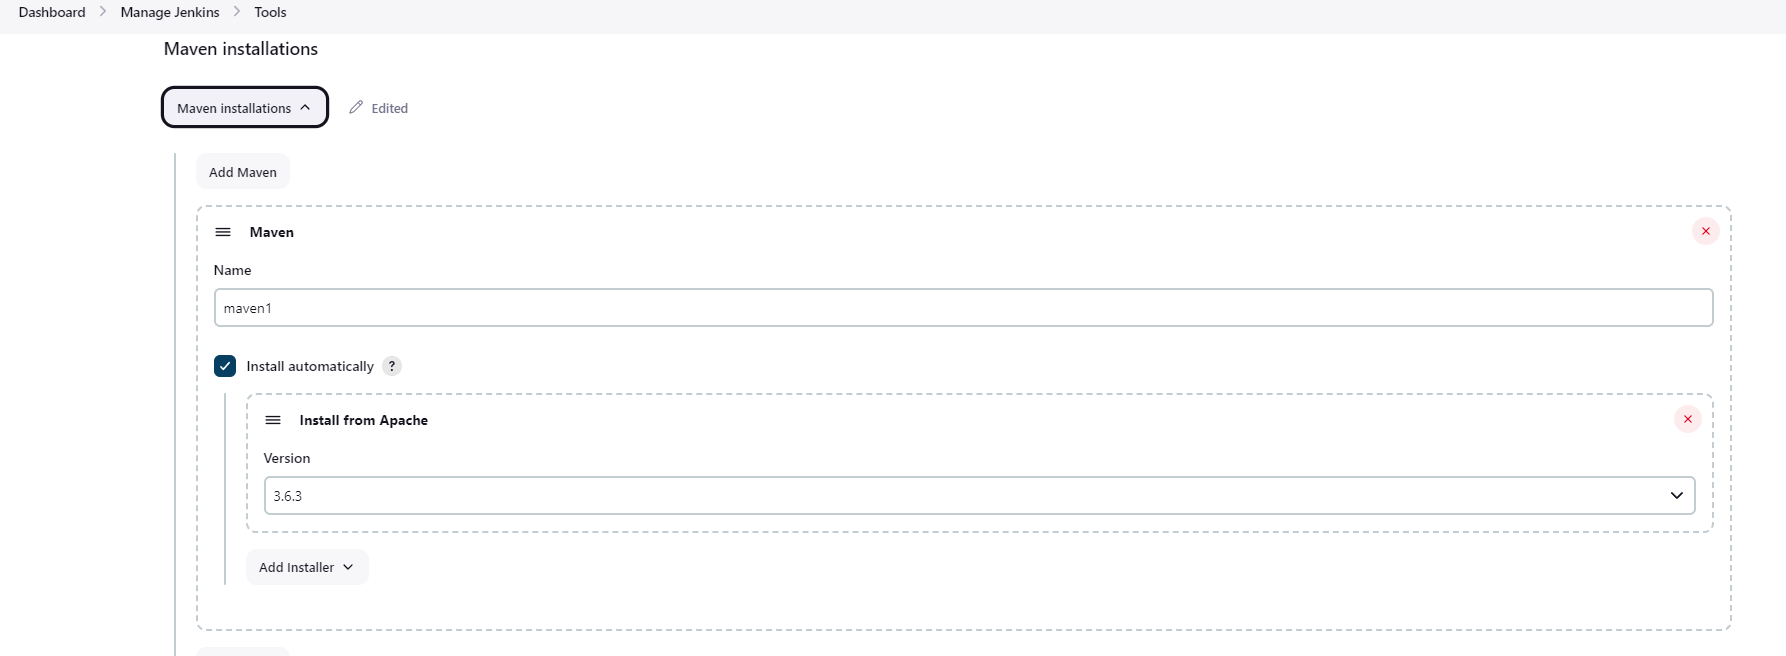
Configure Tool on Jenkins Server.
Git
Java, In my case i have installed jdk-11.
Maven
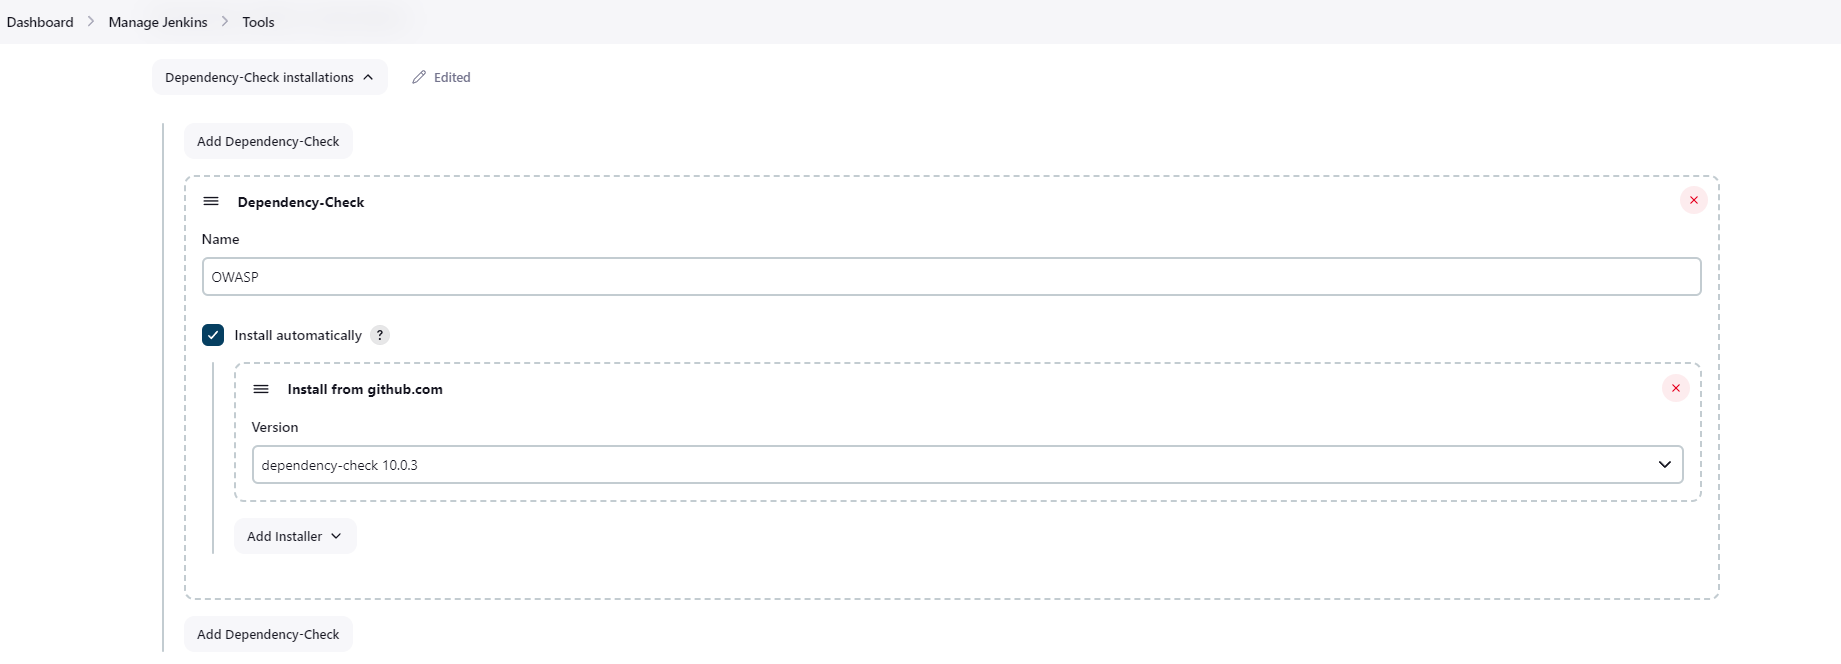
OWASP dependency Check
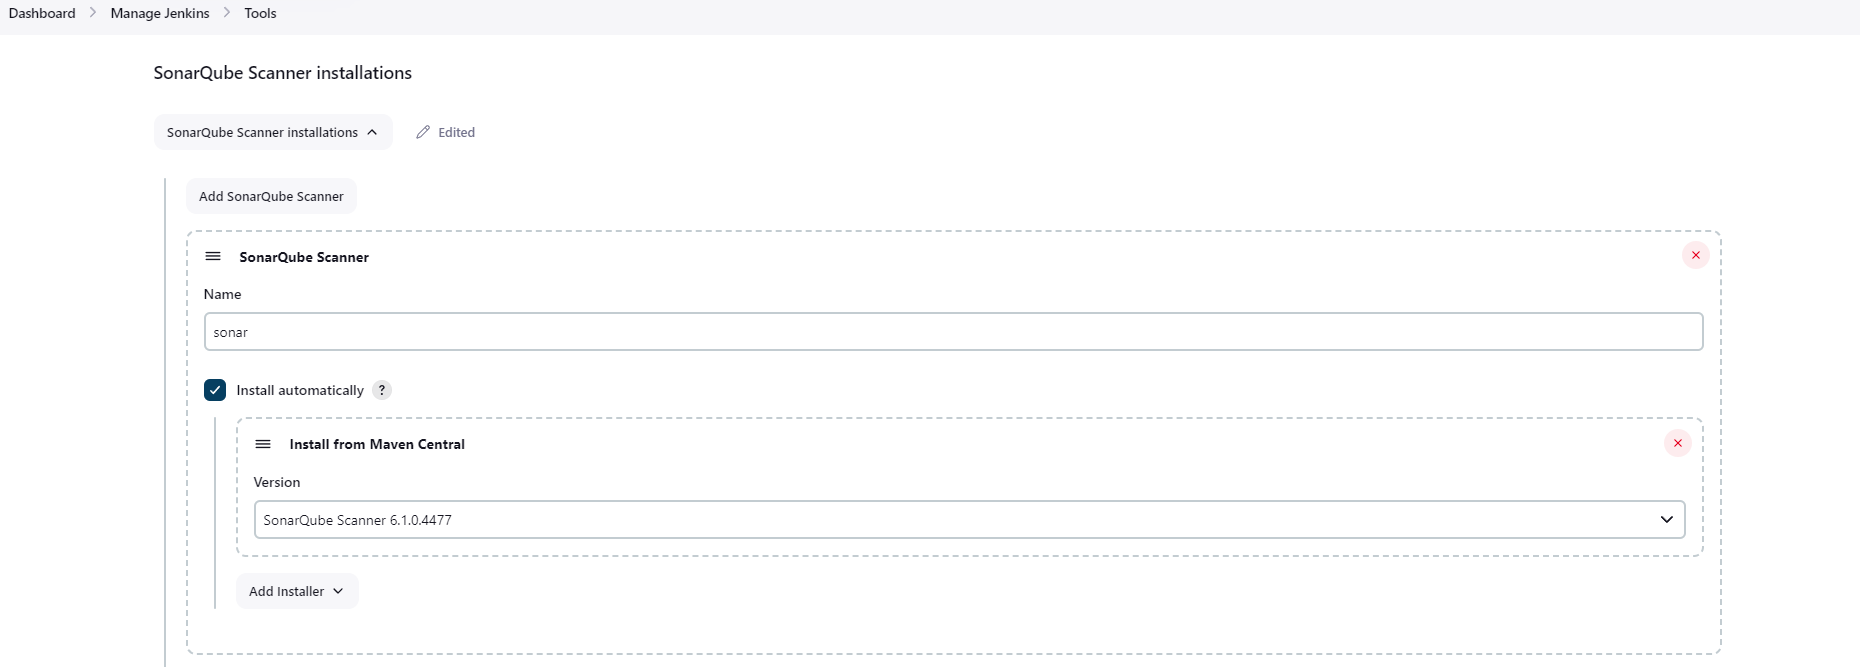
SonarQube Scanner
Add System setting in Jenkins.
SonarQube Server Configuration-IP:192.168.100.121,Port:9000

ZAP

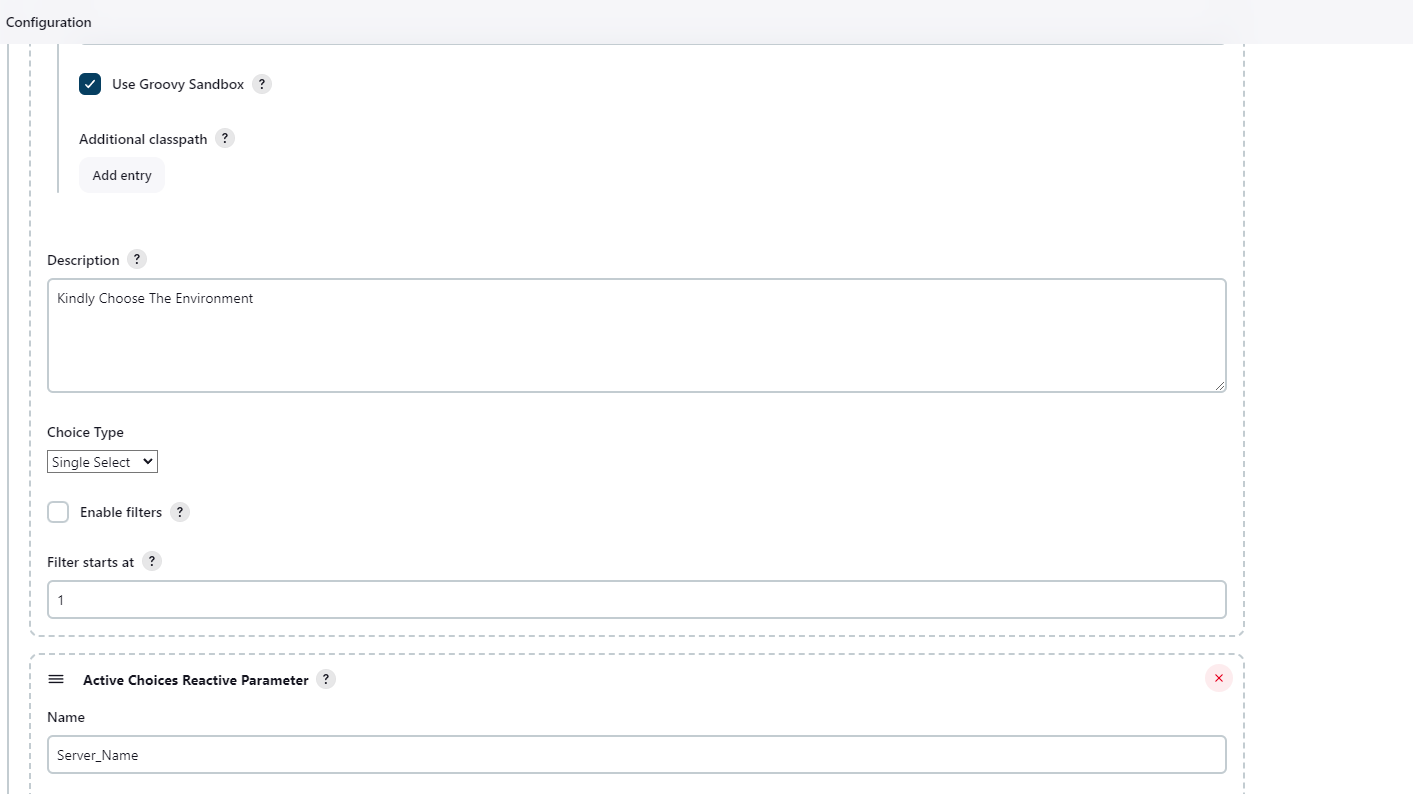
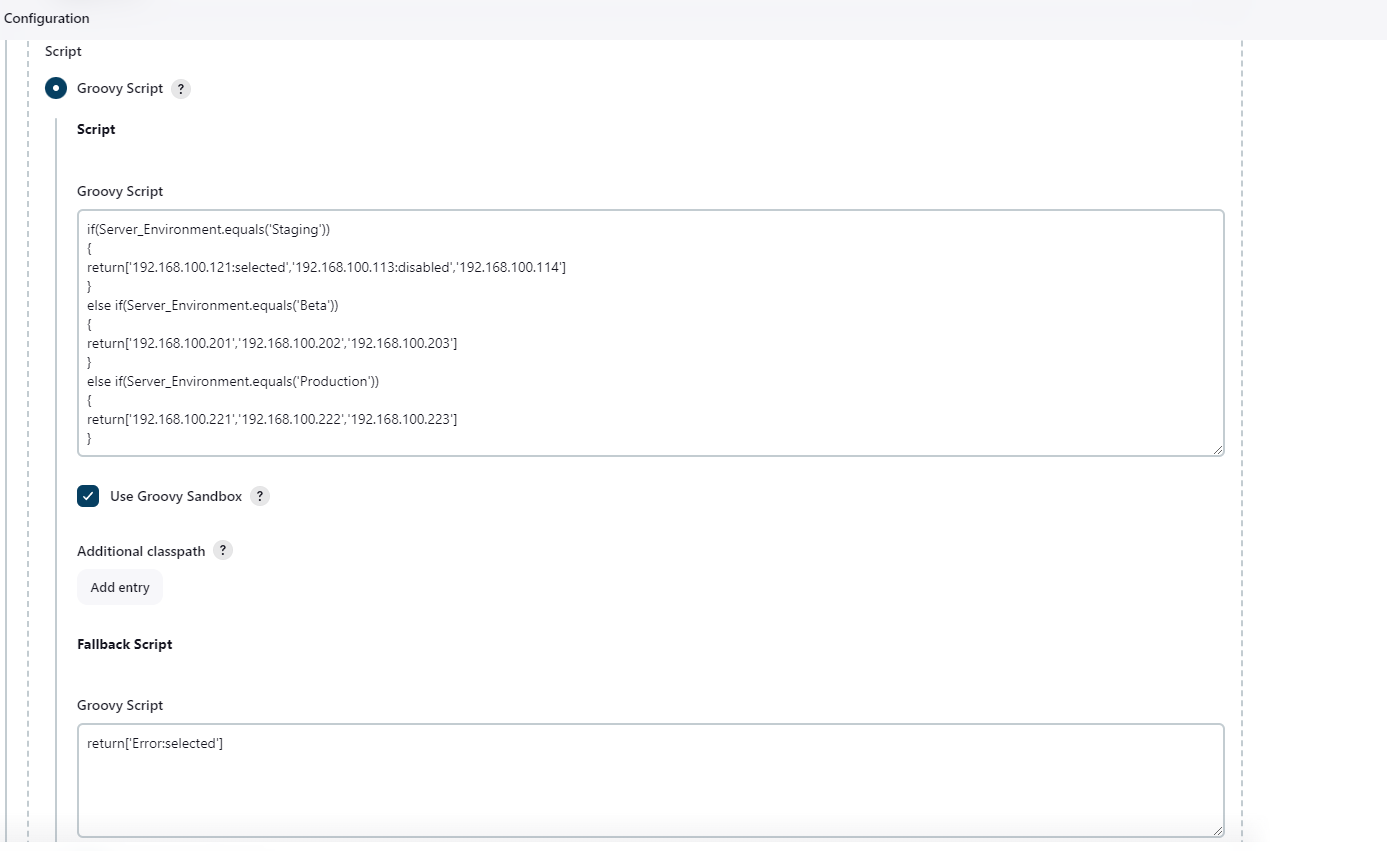
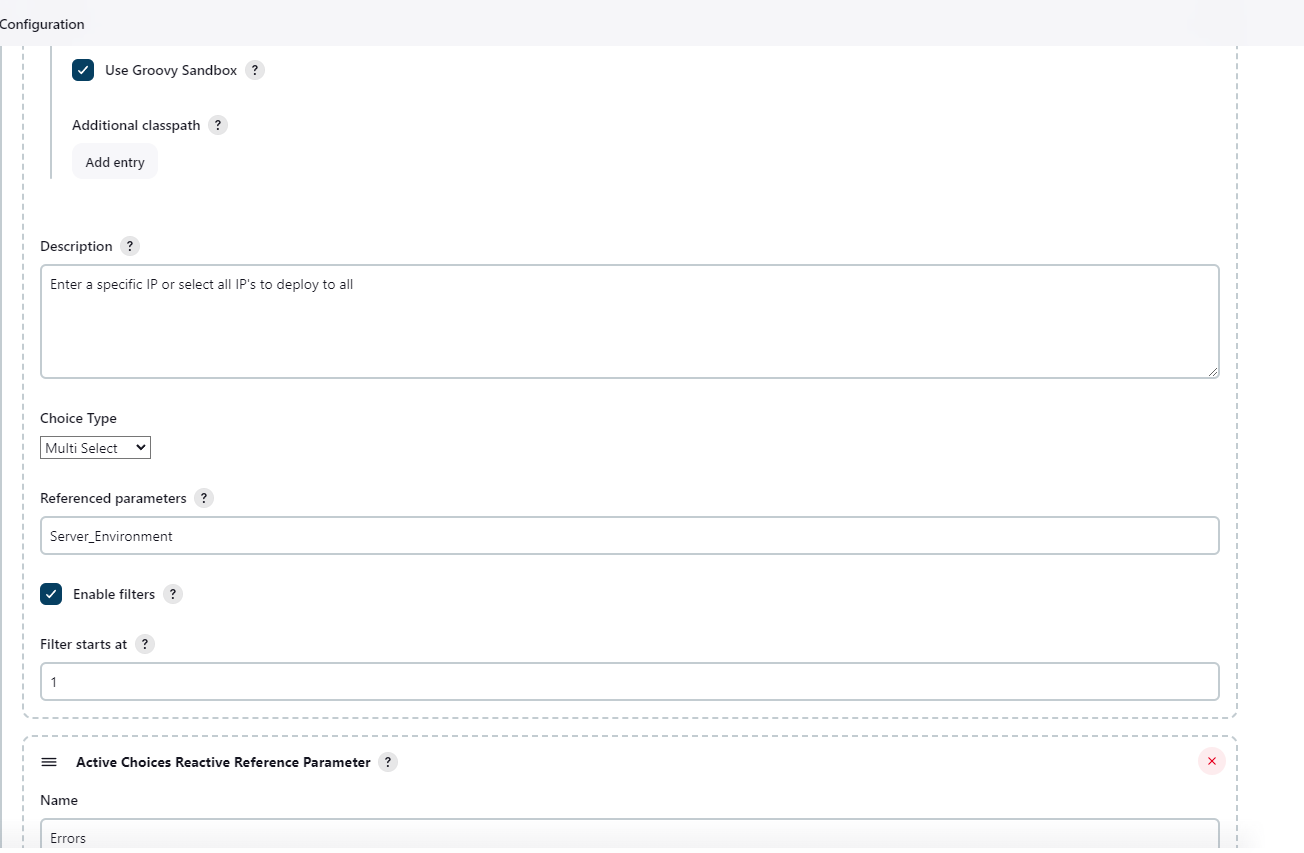
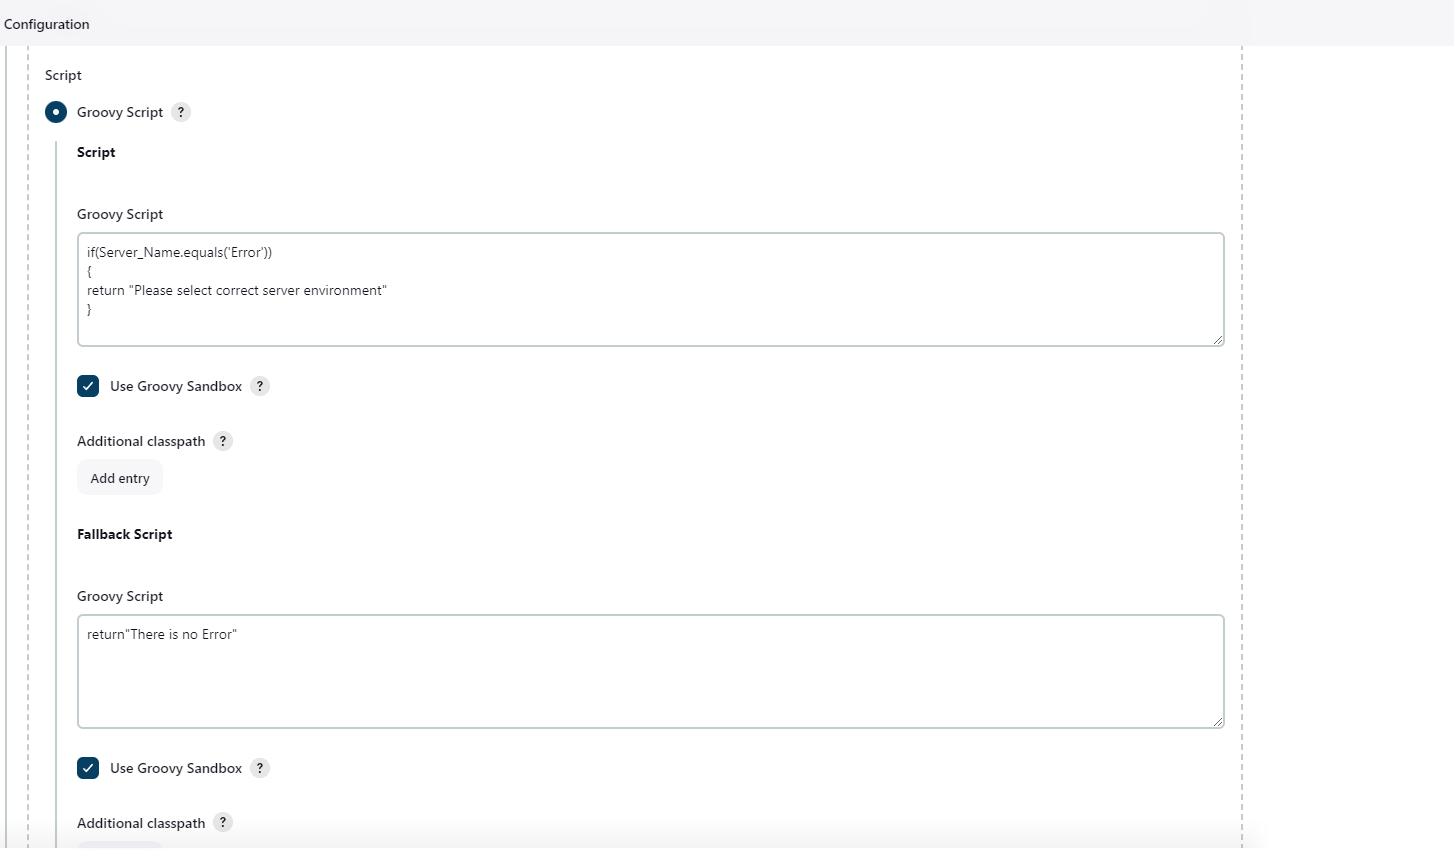
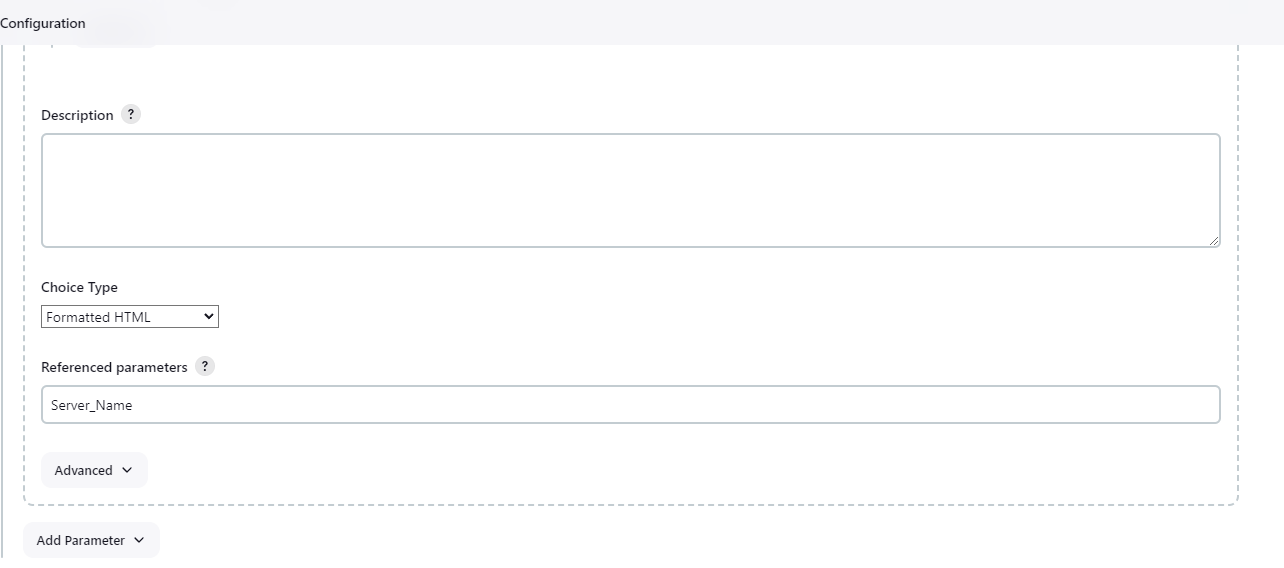
Now, Configure Active Choice Parameters.

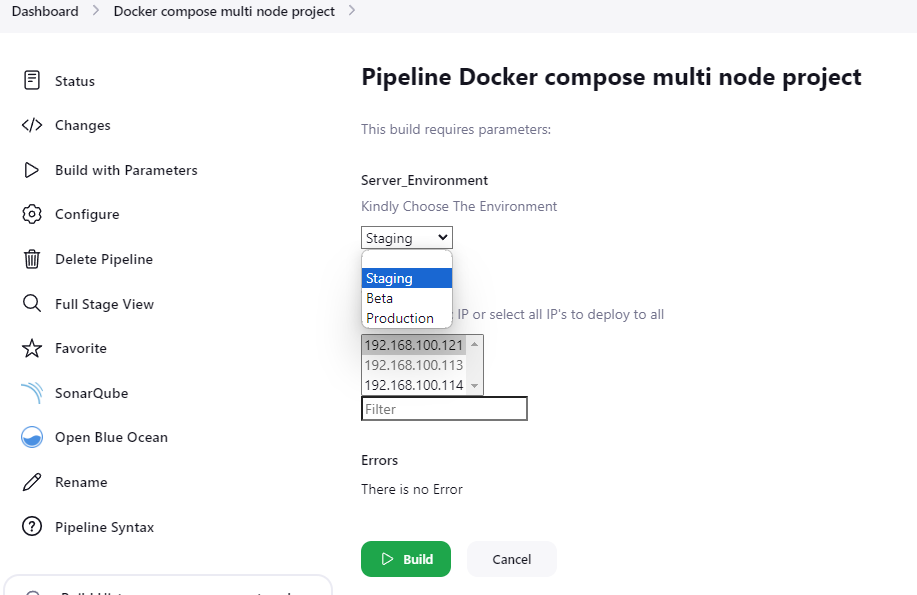
Jenkins File for DevSecOps Pipeline. My Web-Application is running on http://192.168.100.121:8000
pipeline{
    agent any
             environment{
                    HOME_SONAR= tool "sonar"
                    DOCKER_CREDENTIALS_ID = 'dockercred'
                    SSH_CREDENTIALS_ID = 'multi-ip'
            }
    stages{
        stage('code clone'){
            steps{
                git url: "https://github.com/your-username/your-repo.git",branch : "main" , credentialsId: "gitcred"
                sshagent(['multi-ip']) {
                    sh """
                        ssh -o StrictHostKeyChecking=no username@$Server_Name '
                        rm -rf $HOME/$Server_Environment &&
                        mkdir -p $HOME/$Server_Environment &&
                        cd $HOME/$Server_Environment &&
                        git clone "https://github.com/your-username/your-repo.git" '
                    """
                }
            }
        }
        stage('docker build'){
            steps{
                sh "docker build -t your-app:latest ."
            }
        }
         stage("sonar-scanner analysis"){
            steps{
                withSonarQubeEnv("sonar"){
                    sh "$HOME_SONAR/bin/sonar-scanner -Dsonar.projectName=your-app -Dsonar.projectKey=notes-project"
                }
            }
        }
        stage("sonarqube-quality gate"){
            steps{
                timeout(time : 1, unit: "MINUTES"){
                    waitForQualityGate abortPipeline : false
                }
            }
        }
        stage('owasp'){
            steps{
               dependencyCheck additionalArguments: '--scan ./', odcInstallation: 'OWASP'
               dependencyCheckPublisher pattern: "**/dependency-check-report.xml"
            }
        }
        stage('trivy'){
            steps{
                sh "trivy image your-app:latest"
            }
        }

        stage("Push to DockerHub"){
            steps{
                withCredentials([usernamePassword(credentialsId: 'dockercred', usernameVariable: 'DOCKER_USERNAME', passwordVariable: 'DOCKER_PASSWORD')]){
                sh "docker image tag your-app:latest ${DOCKER_USERNAME}/your-app:latest"
                sh "echo ${DOCKER_PASSWORD} | docker login -u ${DOCKER_USERNAME} --password-stdin"
                sh "docker push ${DOCKER_USERNAME}/your-app:latest"
                }
            }
        }
        stage('docker deploy'){
            steps{

                withCredentials([usernamePassword(credentialsId: "${DOCKER_CREDENTIALS_ID}", usernameVariable: 'DOCKER_USERNAME', passwordVariable: 'DOCKER_PASSWORD')]) {
                    sshagent(['multi-ip']) {
                        sh """
                            ssh -o StrictHostKeyChecking=no username@$Server_Name '
                            echo "$DOCKER_PASSWORD" | docker login -u "$DOCKER_USERNAME" --password-stdin &&
                            docker pull "${DOCKER_USERNAME}"/your-app:latest &&
                            ip r
                        cd $HOME/$Server_Environment/your-app &&
                            docker compose down && docker compose up -d '
                        """
                    }
                }

            }
        }
        stage('DAST after Deploy'){
            steps{

                    withCredentials([usernamePassword(credentialsId: "${DOCKER_CREDENTIALS_ID}", usernameVariable: 'DOCKER_USERNAME', passwordVariable: 'DOCKER_PASSWORD')]) {
                    sshagent(['multi-ip']) {
                        sh """
                            ssh -o StrictHostKeyChecking=no username@$Server_Name '
                            echo "$DOCKER_PASSWORD" | docker login -u "$DOCKER_USERNAME" --password-stdin &&
                            docker pull iniweb/owasp-zap2docker-stable
                            docker run -t iniweb/owasp-zap2docker-stable zap-baseline.py -t http://192.168.100.121:8000 || true || true '
                        """
                    }
                }
            }
        }
    }
}
Build you job with the help of Active Choice Parameter.
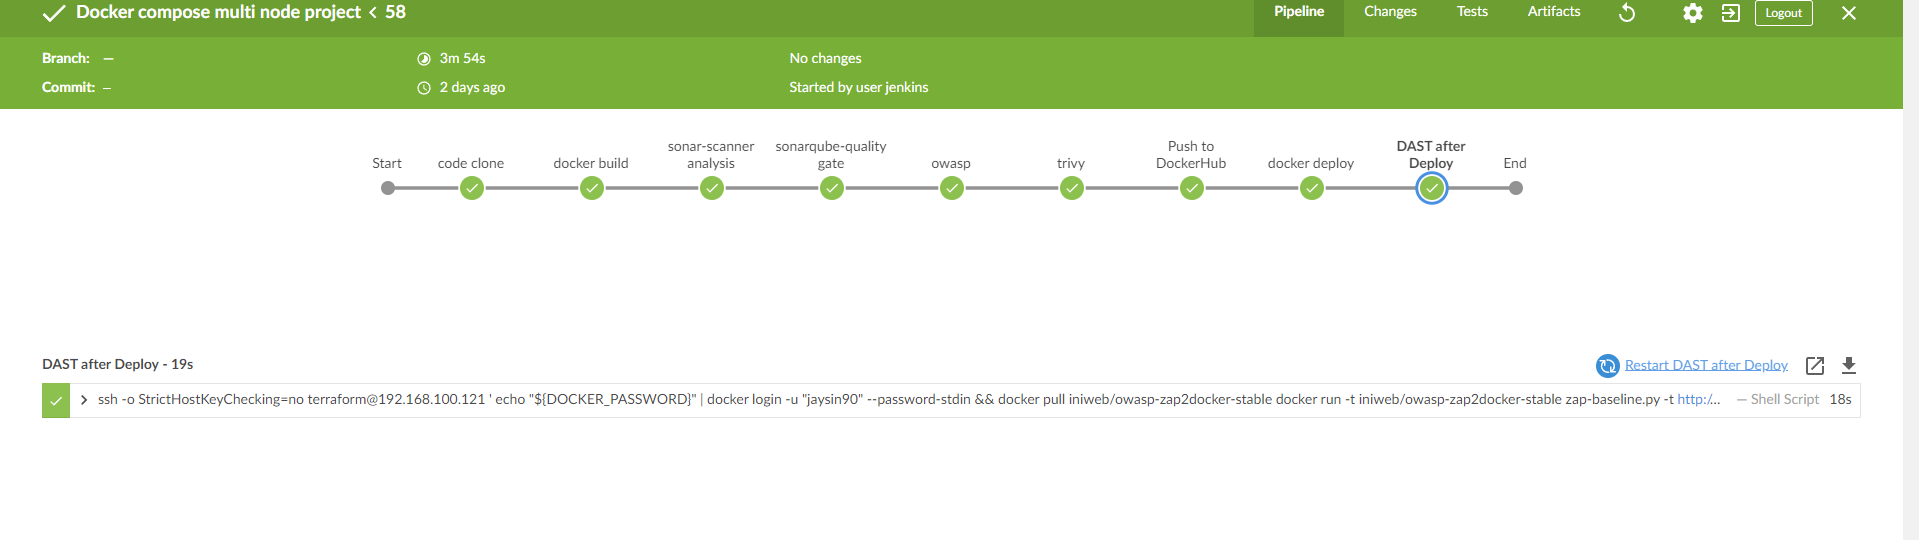
Jenkins Pipeline Output On Blue Ocean look like this.
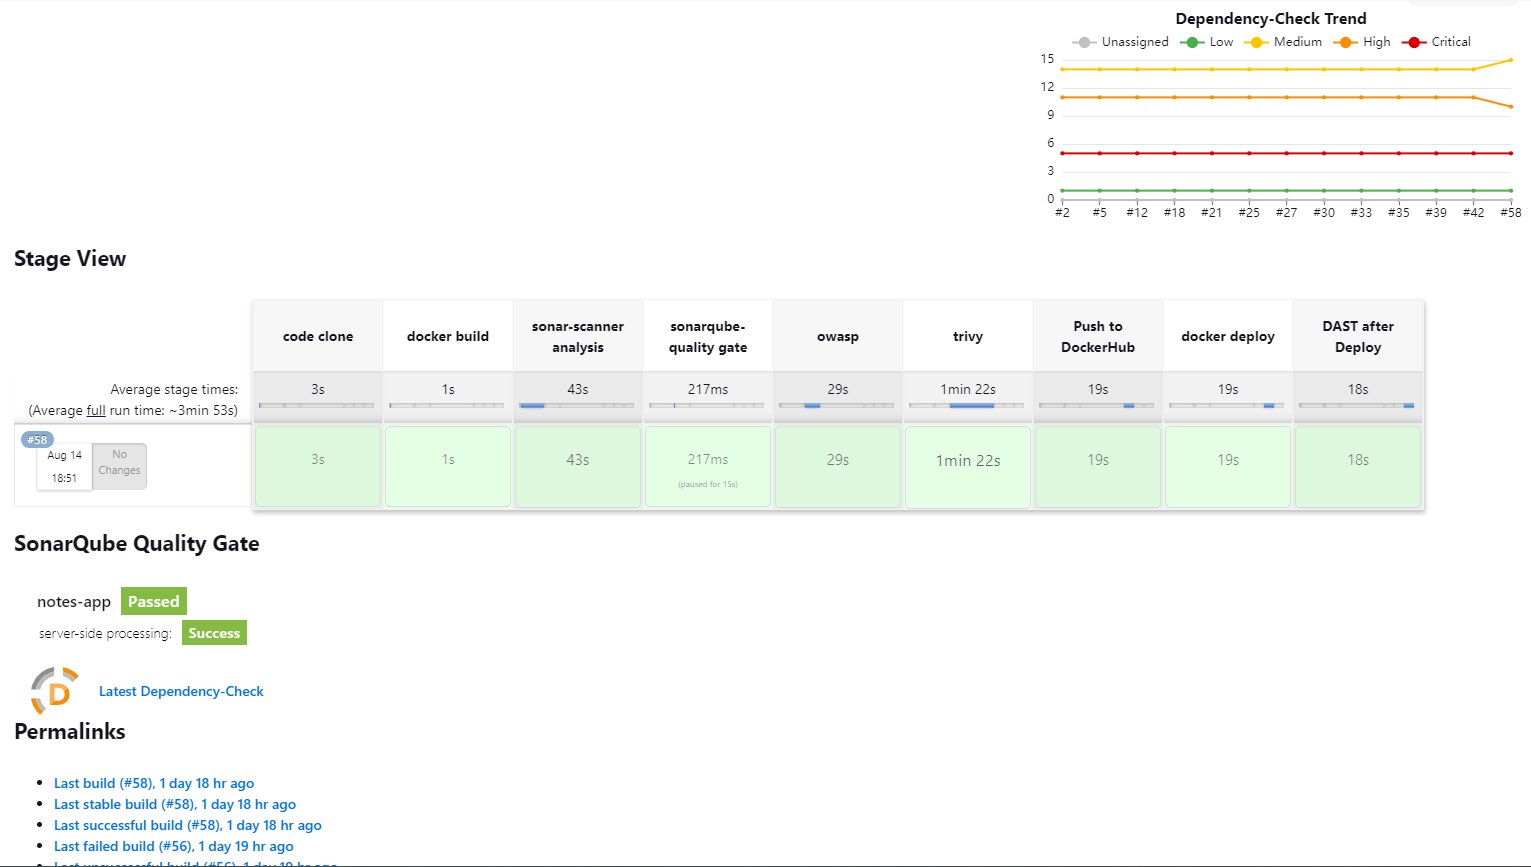
Standard Output of Jenkins Pipeline
Note: If you are using any cloud allow traffic on below ports in your security group.
Your application Port, In my case 8000.
Your SonarQube Port 9000.
Your Jenkins Port 8080.
HTTP Port 80 and HTTPS Port 443.

